 Several months ago, I had the opportunity to attend an awesome 2-day workshop entitled “Garden Troubleshooting” at the Denver Urban Gardens headquarters. We learned about good bugs, bad bugs and a variety of plant diseases and disorders and how to address them. Many of those lessons have come in handy for me this summer. But now that its harvest time, I find myself referring to the section on when and how to harvest and how to store my produce. Thanks to Carol O’Meara of the Colorado State University Extension in Boulder County, I have a better handle on how to harvest and store my produce. Here is some of what she shared with us in the her workshop, “Between Harvest and Kitchen”.
Three Golden Rules:
- Keep it cool
- Keep it wet
- Handle with care
Too Much Cooling is a Bad Thing and can cause high respiration, uneven ripening, off flavor, pitting, premature rotting, discoloration or woody tissue, fungal disease
Chilling Injury Thresholds
- 45 F: beans, cucumbers, peppers, eggplant
- 45-50 F: melons
- 50 F: tomatoes/winter squash
- 55 F: sweet potato (put in frig for 2 weeks to make sweeter)
Curing: a short time in a warm, dry place which toughens the skins, dries surface, improves flavor and texture and heals cuts.
- potatoes, pumpkins, winter squash (is sweeter later); except for acorn squash which gets stringy
- onions need 5-7 dayss at a dry 70-80 F
- sweet potatoes need 5-7 days at 80-85 F and humid
Harvesting
Snap Beans
- pod diameter, not length determines quality
- harvest after dew evaporates
- avoid tearing or damaging pods; don’t squeeze them
- keep harvested pods out of the sun
- cool within 2 hours of harvest
- store in refrigerator with humidy pad (damp paper towel)
Broccoli
- water consistently
- heads should have dark or bright green closed (no yellow) florets

Broccoli is ready to harvest.
- compact, firm to hand pressure
- steams bright green with no discoloration
- rapidly cool and store cool
Brussel Sprouts
- spouts found at base of leaf
- harvest at 1-2 inches diameter
- sprouts mature form bottom of stalk up
- harvest individually
- front sweetens flavor, but avoid letting them freeze
- cool
Corn
- green husk, dry brown silk
- loses sugar rapidly in heat
- pick in early morning, cool immediately
- eat soon
- store at 32 F in humidity for up to 5 days
Eggplant
- before seed matures
- look for firm, glossy pods
- when pressed with fingernail, indentation remains
- fresh, green calyx
Garlic
- cut water when leaves brown
- harvest when leaves are 2/3 brown

I waited for the stems to dry after clipping off the garlic scapes several weeks ago. Ready to dig up the garlic cloves.
- don’t wash bulbs with water — will ruin
- cure garlic in dry, warm location for 7-10 days
- cut stems to one inch
- can freeze in glass, leave papery outer skin
Melons
- Count the days. roughly one month after the plant flowers, melons begin ripening.
- should be full -boidied and heavy for their size; some changes in fruit color yellow to tan
- muskmelons slip from the steam easily when ripe
- watermelon belly turns cream or yellow and the tendrils closet to fruit wither
- cantelope: neeting, count days from flowering, fruit behind bloom female once flower closed — 40 days
- muskmelons slip: smell it, stem will have crack 2/3 around (slip stage); time to sling if trellised.
Onions
- harvest young 1/4 inch to 1 inch for fresh use; 1- 1/2 for pickling or when tops have fallen over and necks are shriveled for storage
- air dry in single layers in shade for 3-4 weeks; remove tops
- don’t wet, wait a day to cure
- storing — onions vary in storage capability, more pungent types with high soluble solids contents store longer, mild onions with low soluble solids contents are rarly stored for more than a month,
- store at 32-50 F or RH 60-70%
Peppers
- clip from plant
- more susceptible to sunscald, water loss and heat damage after harvest
- store at 40-45 F, high humidity
- paprika is a dry blend of peppers, remove seeds
Potatoes
- stop irrigation 2-3 weeks prior to harvest
- remove vines before digging tubers
- cure for 2 weeks in 45-60 F dark room – this will set skins
- prevent sun exposure which will green skins and is toxic
- can store up to 10 months in proper conditions
- store at 39-45 F, 95-98 percent RH, air circulation
Root Crops
Carrots
- clip tops for storage at 33 F in high humidity
- mulch carrots for fresh pulling into winter, hill a foot of straw over shoulders after ground cools in fall
- dig and store before ground freezes
- parsnips like to get cold
- can use carrot tops in salad
Beets
- harvest at 1.5-2 inchues, pull fall planted beets before first freeze
- clip tops to 1 inch before refrigerating up to two weeks
- do not store in frozen ground
Parsnips, horseradish, turnips
- improve in flavor with light freezing
- at temps 28-34 F starch converts to sugar
- mulch with straw and leave in ground into winter
- pull and use before Spring
Tomatoes
Harvesting Tomatoes
- harvest when fruits are uniformly red, but before end softens
- ripe fruit sinks in water (useful when gauging ripeness of green tomatoes)
- when to let the season end — frost protection works best on tomatoes already coloring up, green ones are harmed by chill
- if there is a run of cold nights, pick off green tomatoes and leave the blushed ones on the plant

Tomatoe ready to pick.
Speed Up Ripening
- thinning — immature fruit won’t size up or ripen by season’s end, so snip off blossoms and young fruit to leave the plant’s energy to full-grown tomatoes
- new shoots and overloads of mature tomatoes also slow ripening prune off suckers and young stems, then pluck a few green tomatoes for ripening on the counter
- on run of cool nights, pick off green ones to let blush ones ripen
- cut back water to the plants to hasten vine ripening
- pull the plant from the ground and hang it upside down in a dry, sheltered area. Fruit should be harvested before completely ripe and allowed to finish on the counter or it may fll from the vine and create a mess
When Frost Hits
- once hit by frost, tomatoes break down quickly and are not suitable for canning
- cut off the bad spots, then use immediately in your favorite recipes or chop and freeze them for winter dishes
Green Tomatoes for Storage
- pick green tomatoes for strage from healthy vines or pink ones to ripen on the counter
- prevent problesm from rot: harvest when plants are dry, avoiding fruit that is diseased or has insect damage
- clip tomoatoes from the wine, many heirlloms have “knuckled” stems that tear
- mature green tomatoes stores best — those that are full-sized, glossy light green to white with a whitish star on the blossom end
- tip: dark green tomatoes are immature and should be used right away as fried green tomatoes, in relish or stewed
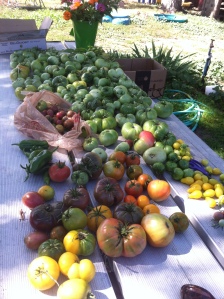
The final tomatoe harvest before the hard frost.
Harvest
- breakers: should your tomatoes begin to color at the blossom end, know as a “breaker”, it will continue to ripen quickly for you on your counter and taste close to vine ripened
- pinks: colored up but not fully ripe will ripen on the counter
- sort tomatoes into groups that will ripen at the same speed — mature green, breakers, pinks and red
Countertop Holding/Ripening
- at room temperature, red tomatoes are ready within a day or two
- pinks (3-=60 % colored) will be ready in 7-10 days
- mature greens and breakers, up to 14 days
Storing Green Tomatoes
- clip stems short, wash gently and pat dry. Store in a box with good ventilation at 55-68 degrees (frig too cold)
- check tomatoes frequently for spoiling
- to store longer, wrap tomatoes in newspaper and place 1-2 layers deep in a box. Keep in a cool, 55-60 degree room, out of sunlight.
Winter Squash
- speed ripening by cutting back water to the plant slowly over a few weeks so you don’t interrupt growth of young squash
- pluck blossoms from the plant to allow the plant to pump energy into the fruit
- watch for signs of maturity, such as stem drying out or the rind turning a deep color
- harvest when the skin toughens and isn’t dented by pressure from a fingernail; stem turns tan
- cut stem from vine with sharp knife, leaving stem attached to squash (w/o stem, squash decays around stem scar)
- cure 10 days in dry room, 75-85 F
In Garden Storage
- beets, cabbage, Chinese cabbage, cauliflower, celery, endive, cos or romaine lettuce, kale, leeks, and onions can withstand the early light frosts store for several weesk under a heavy (1 ft. mulch)
- Pits/Mounds: dig a 6-10 inch deep trench, layer 3-4 inches of straw, place cabbage, carrots, beets, celeriac, kohlrobi, rutabagas, turnips, and winter radishes on top of much, cover with 12 inches straw, then 3 inches soil; once you open mound, ALL produce must be removed and used within 2 weeks
Root Cellars
- store potatoes, carrots, beets, turnips, rutabagas, winter radishes, kohlrabi, parsnips
Recommended Storage Temperatures and Relative Humidity Levels
COLD AND VERY MOIST (33-40 F, 90-95% RH)
Beets, Brussel Sprouts, Carrots, Parsnips, Turnips, Rutabegas, Leeks, Celeriax, Winter Radish (Daikon), Sunchokes
COLD AND MOIST (32-40 F, 80-90% RH)
Potatoes, Apples, Cabbage
COOL AND DRY (32-50 F, 60-70% RH)
Garlic, Onions, Dry Beans
MODERATELY WARM AND DRY (50-60 F, 60-70% RH)
Winter Squash, Pumpkin, Sweet Tomatoes


![IMG_2062[1]](https://anaincolorado.wordpress.com/wp-content/uploads/2016/02/img_20621.jpg?w=127&h=169)
![IMG_2067[1]](https://i0.wp.com/anaincolorado.wordpress.com/wp-content/uploads/2016/02/img_20671.jpg?w=159&h=212&ssl=1 "IMG_2067[1]")
![IMG_2060[1]](https://i0.wp.com/anaincolorado.wordpress.com/wp-content/uploads/2016/02/img_20601.jpg?w=159&h=212&ssl=1 "IMG_2060[1]")
![IMG_2061[1]](https://i0.wp.com/anaincolorado.wordpress.com/wp-content/uploads/2016/02/img_20611.jpg?w=159&h=212&ssl=1 "IMG_2061[1]")
![IMG_2058[1]](https://i0.wp.com/anaincolorado.wordpress.com/wp-content/uploads/2016/02/img_20581.jpg?w=159&h=212&ssl=1 "IMG_2058[1]")
![IMG_2064[1]](https://i0.wp.com/anaincolorado.wordpress.com/wp-content/uploads/2016/02/img_20641.jpg?w=232&h=309&ssl=1 "IMG_2064[1]")
![IMG_2068[1]](https://i0.wp.com/anaincolorado.wordpress.com/wp-content/uploads/2016/02/img_20681.jpg?w=412&h=309&ssl=1 "IMG_2068[1]")


